Create AWS Elastic Beanstalk Environment with CLI Commands
Question
You are responsible for creating an AWS Elastic Beanstalk environment as soon as possible by using CLI commands.
It is a PHP application installed on the Linux server.
Besides, in the new environment, a cron job should be set up in all instances.
The file named as cron-linux is prepared for this and uploaded together with other application source code in an S3 bucket.
Which kind of config file and CLI command are correct to create this Elastic Beanstalk environment?
Explanations
Correct Answer - B.
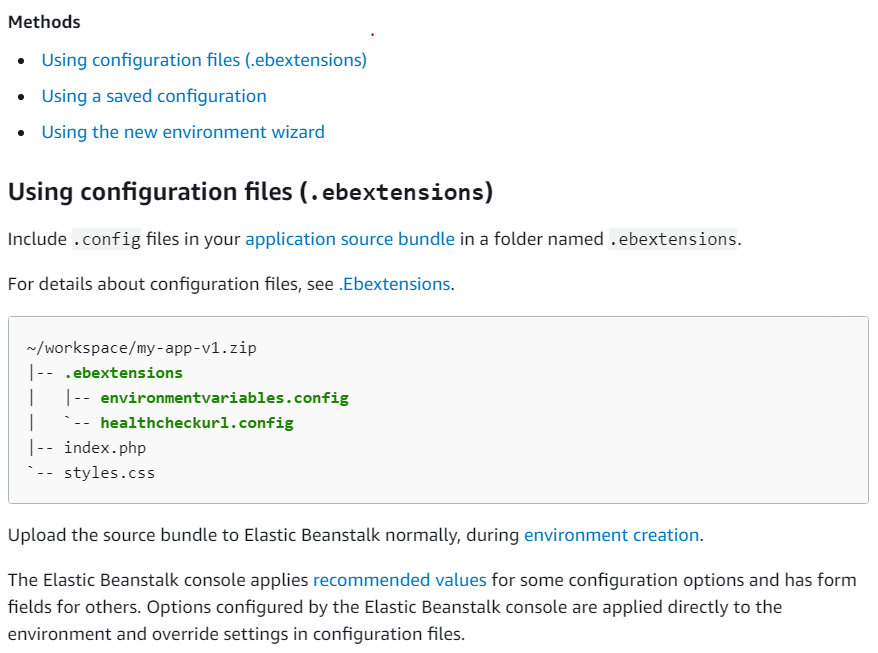
Configuration (.config) files for Elastic Beanstalk are put in the .ebextensions folder together with other application codes.
Please check for the details of setting configurations during environment creation.
https://docs.aws.amazon.com/elasticbeanstalk/latest/dg/environment-configuration-methods-during.html#configuration-options-during-console-ebextensionsOption A is incorrect: Because firstly, it should be cron-linux.config.
Secondly, if AWS Elastic Beanstalk CLI is used, the create-environment command should add options such as --environment-name test-env.
Option B is CORRECT: Because cron-linux.config has been put into the right place and eb create command is suitable to create the environment.
Option C is incorrect: Because cron-linux.cfg.yml has been put into the folder of .elasticbeanstalk/saved_configs/
This is how saved configuration is used for Elastic Beanstalk.
However, in this case, the config file instead of a saved configuration is needed to set up the cron job.
Besides, the AWS Elastic Beanstalk CLI command is used incorrectly.
Option D is incorrect: Because cron-linux.config should be placed into .ebextensions rather than .elasticbeanstalk/saved_configs/.

To create an Elastic Beanstalk environment using CLI commands and configure a cron job, you need to perform the following steps:
- First, create an Elastic Beanstalk application using the following command:
cssaws elasticbeanstalk create-application --application-name <application-name> --region <region> Replace <application-name> with the name of your application and <region> with the AWS region you want to deploy your application.
- Next, create an Elastic Beanstalk environment using the following command:
cssaws elasticbeanstalk create-environment --application-name <application-name> --environment-name <environment-name> --solution-stack-name "64bit Amazon Linux 2 v5.4.2 running PHP 7.4" --region <region> Replace <environment-name> with the name of your environment and <region> with the AWS region you want to deploy your environment. Note that we are using the latest version of Amazon Linux 2 with PHP 7.4 installed.
- Configure the environment to download the
cron-linuxfile from your S3 bucket and install it on each instance by creating a configuration file named.ebextensions/cron.configwith the following content:
bashfiles: "/etc/cron.d/my-cron": mode: "000644" owner: root group: root source: https://s3.amazonaws.com/<bucket-name>/cron-linux Replace <bucket-name> with the name of your S3 bucket.
- Finally, update your Elastic Beanstalk environment to apply the new configuration using the following command:
cssaws elasticbeanstalk update-environment --environment-name <environment-name> --region <region> Replace <environment-name> with the name of your environment and <region> with the AWS region you want to deploy your environment.
Once the environment update is complete, the cron-linux file should be downloaded from your S3 bucket and installed on each instance as a cron job.