Azure App Registration for Azure AD
Question
SIMULATION -
The developers at your company plan to publish an app named App11641655 to Azure.
You need to ensure that the app is registered to Azure Active Directory (Azure AD). The registration must use the sign-on URLs of https://app.contoso.com.
To complete this task, sign in to the Azure portal and modify the Azure resources.
Explanations
See the explanation below.
Step 1: Register the Application
1. Sign in to your Azure Account through the Azure portal.
2. Select Azure Active Directory.
3. Select App registrations.
4. Select New registration.
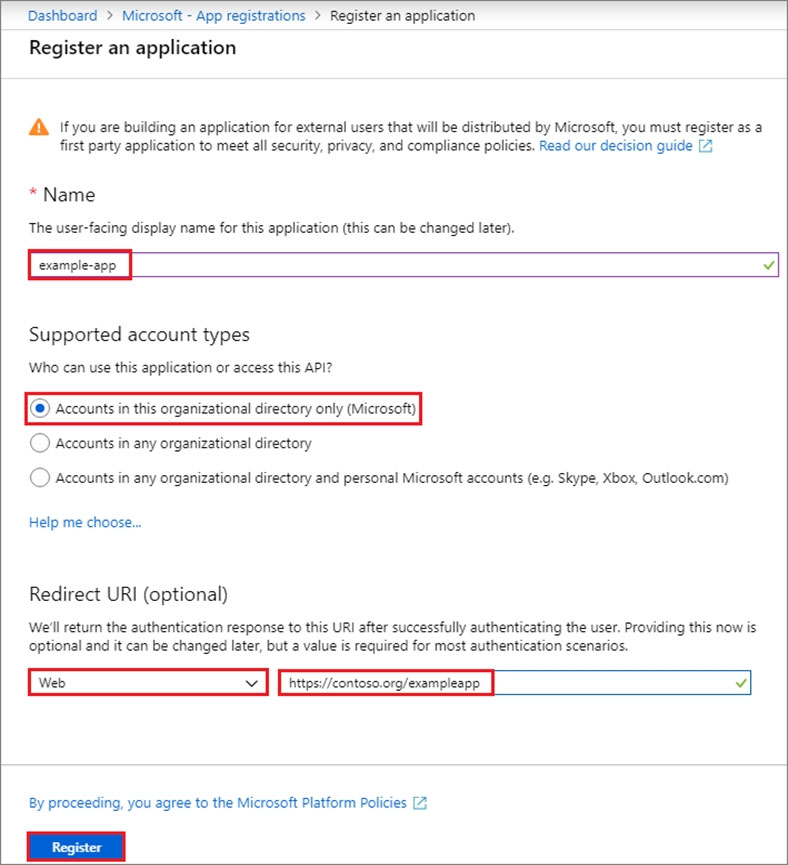
5. Name the application App11641655. Select a supported account type, which determines who can use the application. Under Redirect URI, select Web for the type of application you want to create. Enter the URI: https://app.contoso.com , where the access token is sent to.

6. Click Register
https://docs.microsoft.com/en-us/azure/active-directory/develop/howto-create-service-principal-portalTo register the App11641655 app to Azure Active Directory (Azure AD) with the sign-on URLs of https://app.contoso.com, you can follow the below steps:
- Sign in to the Azure portal using your credentials.
- In the Azure portal menu, select "Azure Active Directory" from the left-hand side menu.
- In the Azure Active Directory page, select "App registrations" from the left-hand side menu.
- In the App registrations page, select "New registration".
- In the "Register an application" page, provide a name for your application, for example, "App11641655".
- Under "Supported account types", select "Accounts in any organizational directory (Any Azure AD directory - Multitenant)" or "Accounts in this organizational directory only (Single tenant)" as per your requirement.
- In the "Redirect URI" section, add the sign-on URLs of https://app.contoso.com.
- Click on the "Register" button to create the registration for the app.
After completing these steps, you will be redirected to the app's overview page, where you can get the application (client) ID and the tenant ID, which you may need to configure your app. You can also assign users or groups to the app and set permissions to control their access to the app.
Note: If you want to enable your app to access APIs or web services in Azure, you may need to create a client secret for your app. To do this, select "Certificates & secrets" from the app's overview page, and then click on "New client secret". Provide a description, set an expiration date, and click on the "Add" button to create the client secret.