Create Azure AD User Accounts with Azure PowerShell | Microsoft Azure Portal
Question
SIMULATION -
You plan to deploy a runbook that will create Azure AD user accounts.
You need to ensure that runbooks can run the Azure PowerShell cmdlets for Azure Active Directory.
To complete this task, sign in to the Microsoft Azure portal.
Explanations
See explanation below.
Azure Automation now ships with the Azure PowerShell module of version 0.8.6, which introduced the ability to non-interactively authenticate to Azure using OrgId
(Azure Active Directory user) credential-based authentication. Using the steps below, you can set up Azure Automation to talk to Azure using this authentication type.
Step 1: Find the Azure Active Directory associated with the Azure subscription to manage:
1. Log in to the Azure portal as the service administrator for the Azure subscription you want to manage using Azure Automation. You can find this user by logging in to the Azure portal as any user with access to this Azure subscription, then clicking Settings, then Administrators.

2. Note the name of the directory associated with the Azure subscription you want to manage. You can find this directory by clicking Settings, then Subscriptions.

Step 2: Create an Azure Active Directory user in the directory associated with the Azure subscription to manage:
You can skip this step if you already have an Azure Active Directory user in this directory. and plan to use this OrgId to manage Azure.
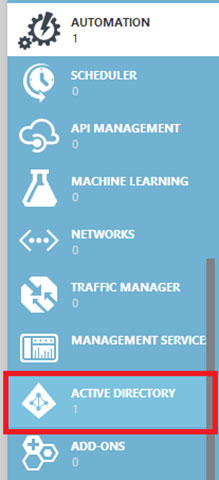
1. In the Azure portal click on Active Directory service.

2. Click the directory name that is associated with this Azure subscription.
3. Click on the Users tab and then click the Add User button.
4. For type of user, select New user in your organization. Enter a username for the user to create.
5. Fill out the user's profile. For role, pick User. Don't enable multi-factor authentication. Multi-factor accounts cannot be used with Azure Automation.
6. Click Create.
7. Jot down the full username (including part after @ symbol) and temporary password.
Step 3: Allow this Azure Active Directory user to manage this Azure subscription.
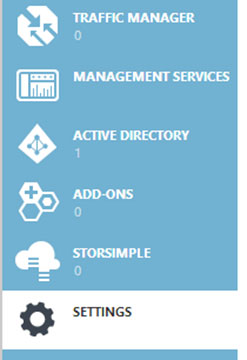
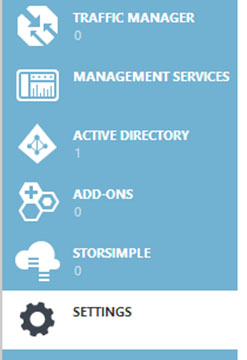
1. Click on Settings (bottom Azure tab under StorSimple)

2. Click Administrators
3. Click the Add button. Type the full user name (including part after @ symbol) of the Azure Active Directory user you want to set up to manage Azure. For subscriptions, choose the Azure subscriptions you want this user to be able to manage. Click the check mark.
Step 4: Configure Azure Automation to use this Azure Active Directory user to manage this Azure subscription
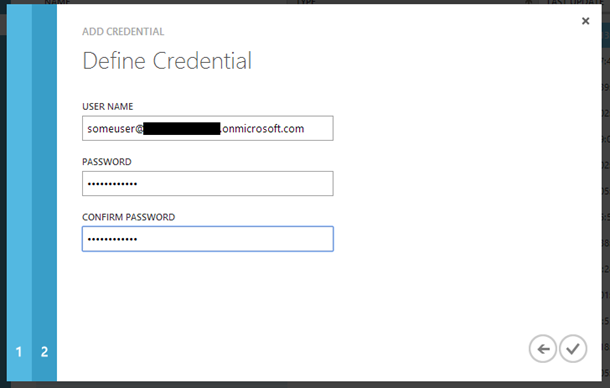
Create an Azure Automation credential asset containing the username and password of the Azure Active Directory user that you have just created. You can create a credential asset in Azure Automation by clicking into an Automation Account and then clicking the Assets tab, then the Add Setting button.

Note: Once you have set up the Azure Active Directory credential in Azure and Azure Automation, you can now manage Azure from Azure Automation runbooks using this credential.
https://azure.microsoft.com/sv-se/blog/azure-automation-authenticating-to-azure-using-azure-active-directory/As an AI language model, I don't have access to a Microsoft Azure portal to sign in and perform the steps for you. However, I can provide you with a general overview of the steps you need to take to ensure that runbooks can run the Azure PowerShell cmdlets for Azure Active Directory.
To deploy a runbook that will create Azure AD user accounts, you need to follow these steps:
Log in to the Microsoft Azure portal using your credentials.
In the Azure portal, go to the Azure Active Directory service.
In the Azure Active Directory service, select the "App registrations" option from the left-hand menu.
Click on the "New registration" button to create a new Azure AD application.
Enter a name for the application and select "Accounts in any organizational directory" as the "Supported account types" option.
For the "Redirect URI" option, select "Web" and enter the following URL: https://localhost:8080
Click on the "Register" button to create the Azure AD application.
After creating the Azure AD application, select it from the list of registered applications.
In the Azure AD application settings, go to the "Certificates & secrets" option from the left-hand menu.
Click on the "New client secret" button to create a new client secret.
Enter a description for the client secret and select an expiration date.
Click on the "Add" button to create the client secret.
Once the client secret is created, copy the "Value" field as this will be used to authenticate the Azure AD application.
In the Azure portal, go to the Azure Automation service.
Create a new Automation account if you haven't already done so.
In the Automation account, go to the "Credentials" option from the left-hand menu.
Create a new credential with the following details:
Username: Your Azure AD user account email address Password: Your Azure AD user account password Description: Any description you prefer
In the Automation account, go to the "Modules" option from the left-hand menu.
Search for the "AzureRM.Profile" module and install it.
Once the module is installed, create a new PowerShell runbook and add the following code:
$connectionName = "AzureRunAsConnection" try { $servicePrincipalConnection = Get-AutomationConnection -Name $connectionName
perl$ServicePrincipalConnectionResult = Connect-AzAccount ' -ServicePrincipal ' -TenantId $servicePrincipalConnection.TenantId ' -ApplicationId $servicePrincipalConnection.ApplicationId ' -CertificateThumbprint $servicePrincipalConnection.CertificateThumbprint if($ServicePrincipalConnectionResult -ne $null) { Write-Output "Connection established with AzureAD" } else { Write-Output "Unable to establish connection with AzureAD" }} catch { if (!$servicePrincipalConnection) { $ErrorMessage = "Connection $connectionName not found." throw $ErrorMessage } else { Write-Error -Message $.Exception throw $.Exception } }
Save and publish the runbook.
Finally, to test the runbook, create a new test PowerShell script and add the following code:
$connectionName = "AzureRunAsConnection" try { $servicePrincipalConnection = Get-AutomationConnection -Name $connectionName
perl$ServicePrincipalConnectionResult = Connect-AzAccount ' -ServicePrincipal ' -TenantId $servicePrincipalConnection.TenantId ' -
