Configuring Staging Environment for az400-11566895-main
Question
SIMULATION -
You plan to implement a CI/CD strategy for an Azure Web App named az400-11566895-main.
You need to configure a staging environment for az400-11566895-main.
To complete this task, sign in to the Microsoft Azure portal.
Explanations
See explanation below.
Add a slot -
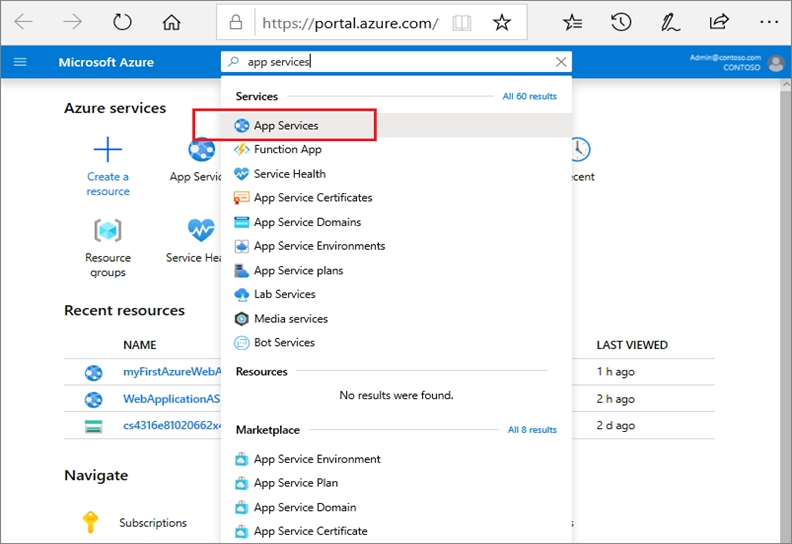
1. In the Azure portal, search for and select App Services and select your app az400-11566895-main.

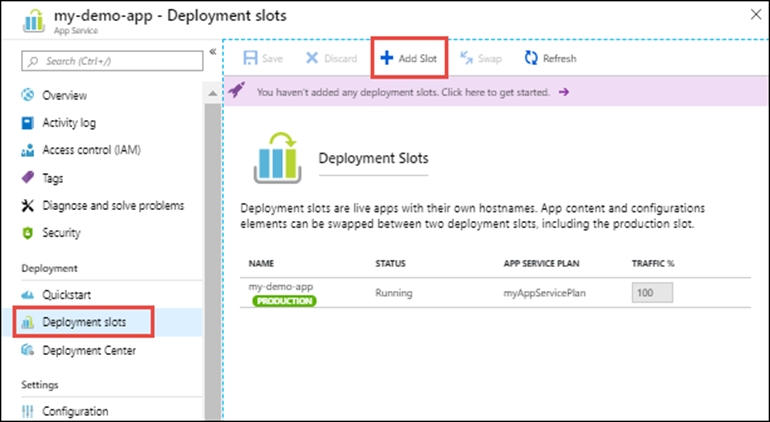
2. In the left pane, select Deployment slots > Add Slot.

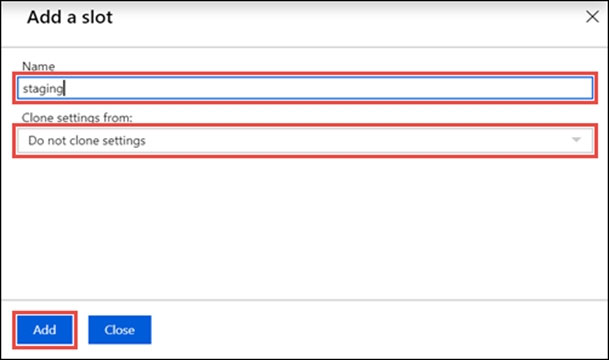
3. In the Add a slot dialog box, give the slot a name, and select whether to clone an app configuration from another deployment slot. Select Add to continue.

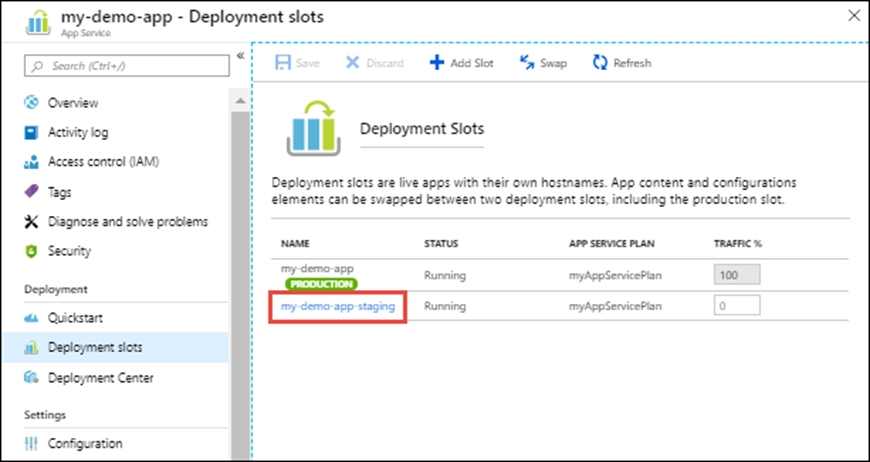
4. After the slot is added, select Close to close the dialog box. The new slot is now shown on the Deployment slots page.

As an AI language model, I do not have access to a live Azure portal for sign-in purposes. However, I can provide you with the general steps to configure a staging environment for an Azure Web App:
Log in to the Azure portal (https://portal.azure.com/) with your Azure account credentials.
Navigate to the Azure Web App you want to configure the staging environment for (az400-11566895-main).
Click on the "Deployment Center" menu option on the left-hand side of the screen.
Select the source control option (e.g., GitHub, Azure Repos, Bitbucket, etc.) you want to use to manage your code.
Configure the build settings for your source control provider. This will involve configuring the build pipeline and defining the build process that your code will go through before it can be deployed to the staging environment.
Once your build pipeline is configured, create a staging slot for your Azure Web App. This will create a separate environment where you can test your code changes before deploying them to the production environment.
Configure the deployment settings for your staging slot. This will involve defining the deployment process for your code changes, such as specifying the deployment source, deployment slot, and any deployment settings or parameters.
Deploy your code changes to the staging slot and test them thoroughly. Use the Azure portal or other testing tools to verify that your code changes are functioning as expected.
Once your code changes have been thoroughly tested in the staging environment, you can deploy them to the production environment by swapping the staging slot with the production slot. This will make your code changes live in the production environment.
Note: The exact steps to configure a staging environment may vary depending on your specific Azure Web App configuration and the source control provider you are using. However, the general process outlined above should provide a good starting point for configuring a CI/CD pipeline for your Azure Web App.